The C’est la Vie sweater was SO fun to design but it’s even more fun to wear! It mixes my love of slip stitch knitting, crochet edgings and of course zipper techniques.
The first pattern I released with a zipper was the Desert Bell (published in Knitty First Fall 2015). I ordered a custom zipper from www.zipperstop.com. Simple, right?! Well, yes but did you also know that adjusting the zipper length is SUPER simple too? My goal in this blog is to demonstrate how easy it can be to adjust the length of any metal tooth zipper. For the C’est la Vie pattern, I purchased a lightweight, 27” zipper from my local craft store, removed the stopper at the end of the zipper using a basic tool and cut it down in size.
Bear in mind that most sewing patterns instruct you to cut plastic teeth zippers at the top (near the pull end) and then sew the zipper closed again. While this method works well for plastic teeth zippers, I don’t like doing this on metal zippers as it can compromise the structure of the zipper. Instead, I use a tool to remove the stoppers at the end of the zipper.
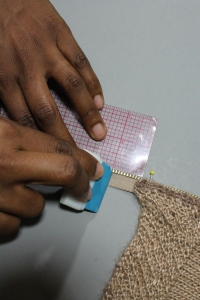
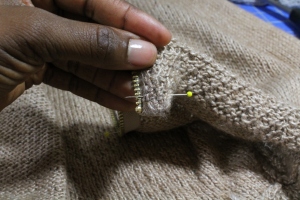
First, pin the zipper to the hand knit to determine where you will need to cut it. Yes, I pin the zipper to the actual garment because I’m working with a knit and knits are very stretchy and they can lie to us when we measure them. If this was a cotton or wool fabric garment, I would measure the zipper opening, cut my zipper and then pin it to the garment. Next, measure down ½-1” from where you plan to cut the zipper and use chalk to mark this point. I like to give myself a little extra room so I usually measure down 1”.
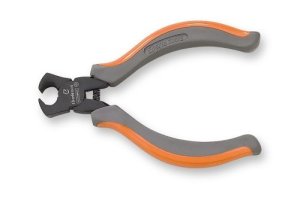
Once the cut line is marked, remove the metal stoppers at the end of the zipper using a zipper pliers. You can use regular pliers but I highly recommend zipper pliers because they have an edge that digs under the zipper teeth to more easily remove them without damaging the fabric. Any good fabric store will have these or you can order online – the ones pictured below are from Seattle Fabrics. Place the metal stoppers in a safe place – we are going to reapply them.
Using the same technique with the zipper pliers, remove 1-2 metal teeth in the area that you will be cutting the zipper so as not to dull your scissors. Cut the zipper.
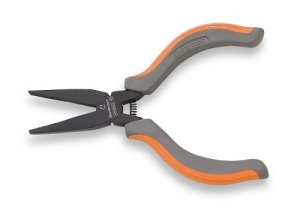
Reapply the zipper stop using flat nose pliers (pictured below and also sold at Seattle Fabric). You may need to remove additional zipper teeth before applying the stops.
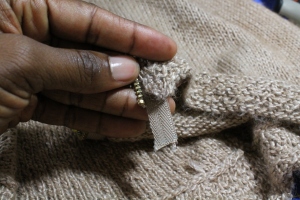
Now, cut away the teeth from the fabric in the area that is below the zipper stop – this area will be folded back so this will eliminate any extra bulk.
Fold back this section toward the garment wrong side.
Wah-lah! You’ve just adjusted your zipper length! Now go and sew the zipper 🙂
See our blog on sewing zippers in hand knits for more instructions.
